When it comes to constructing sturdy retaining walls that not only enhance the visual appeal of a landscape but also offer exceptional structural integrity, Redi-Rock stands out as a trusted solution. Redi-Rock installations have gained immense popularity due to their versatility, durability, and ease of construction. Let's walk through and explore the process of performing Redi-Rock installations, highlighting the essential steps and techniques required to create a reliable and aesthetically pleasing retaining wall.
Step 1: Site Assessment and Preparation:
At the outset, our experienced team conducts a meticulous site assessment to evaluate the terrain, soil conditions, and potential loads. This assessment enables us to determine the optimal design and materials for the Redi-Rock installation. Following the assessment, our skilled professionals clear the installation area of any obstacles, debris, or vegetation that could impede the construction process.
Step 2: Excavation and Grading:
With the site prepared, we commence excavation to establish a level and stable foundation for the Redi-Rock blocks. The dimensions of the excavation, including depth and width, are determined based on the design requirements and the intended height of the retaining wall. Precise excavation ensures adequate space for the base material and proper drainage, laying the groundwork for a successful installation.
Step 3: Base Preparation:
We understand that a solid and stable base is critical for the longevity of the Redi-Rock installation. Following excavation, we meticulously place a geogrid reinforcement layer, which is then followed by a carefully compacted base material such as crushed stone or gravel. This robust base layer provides structural stability, facilitates water drainage, and reinforces the integrity of the retaining wall.
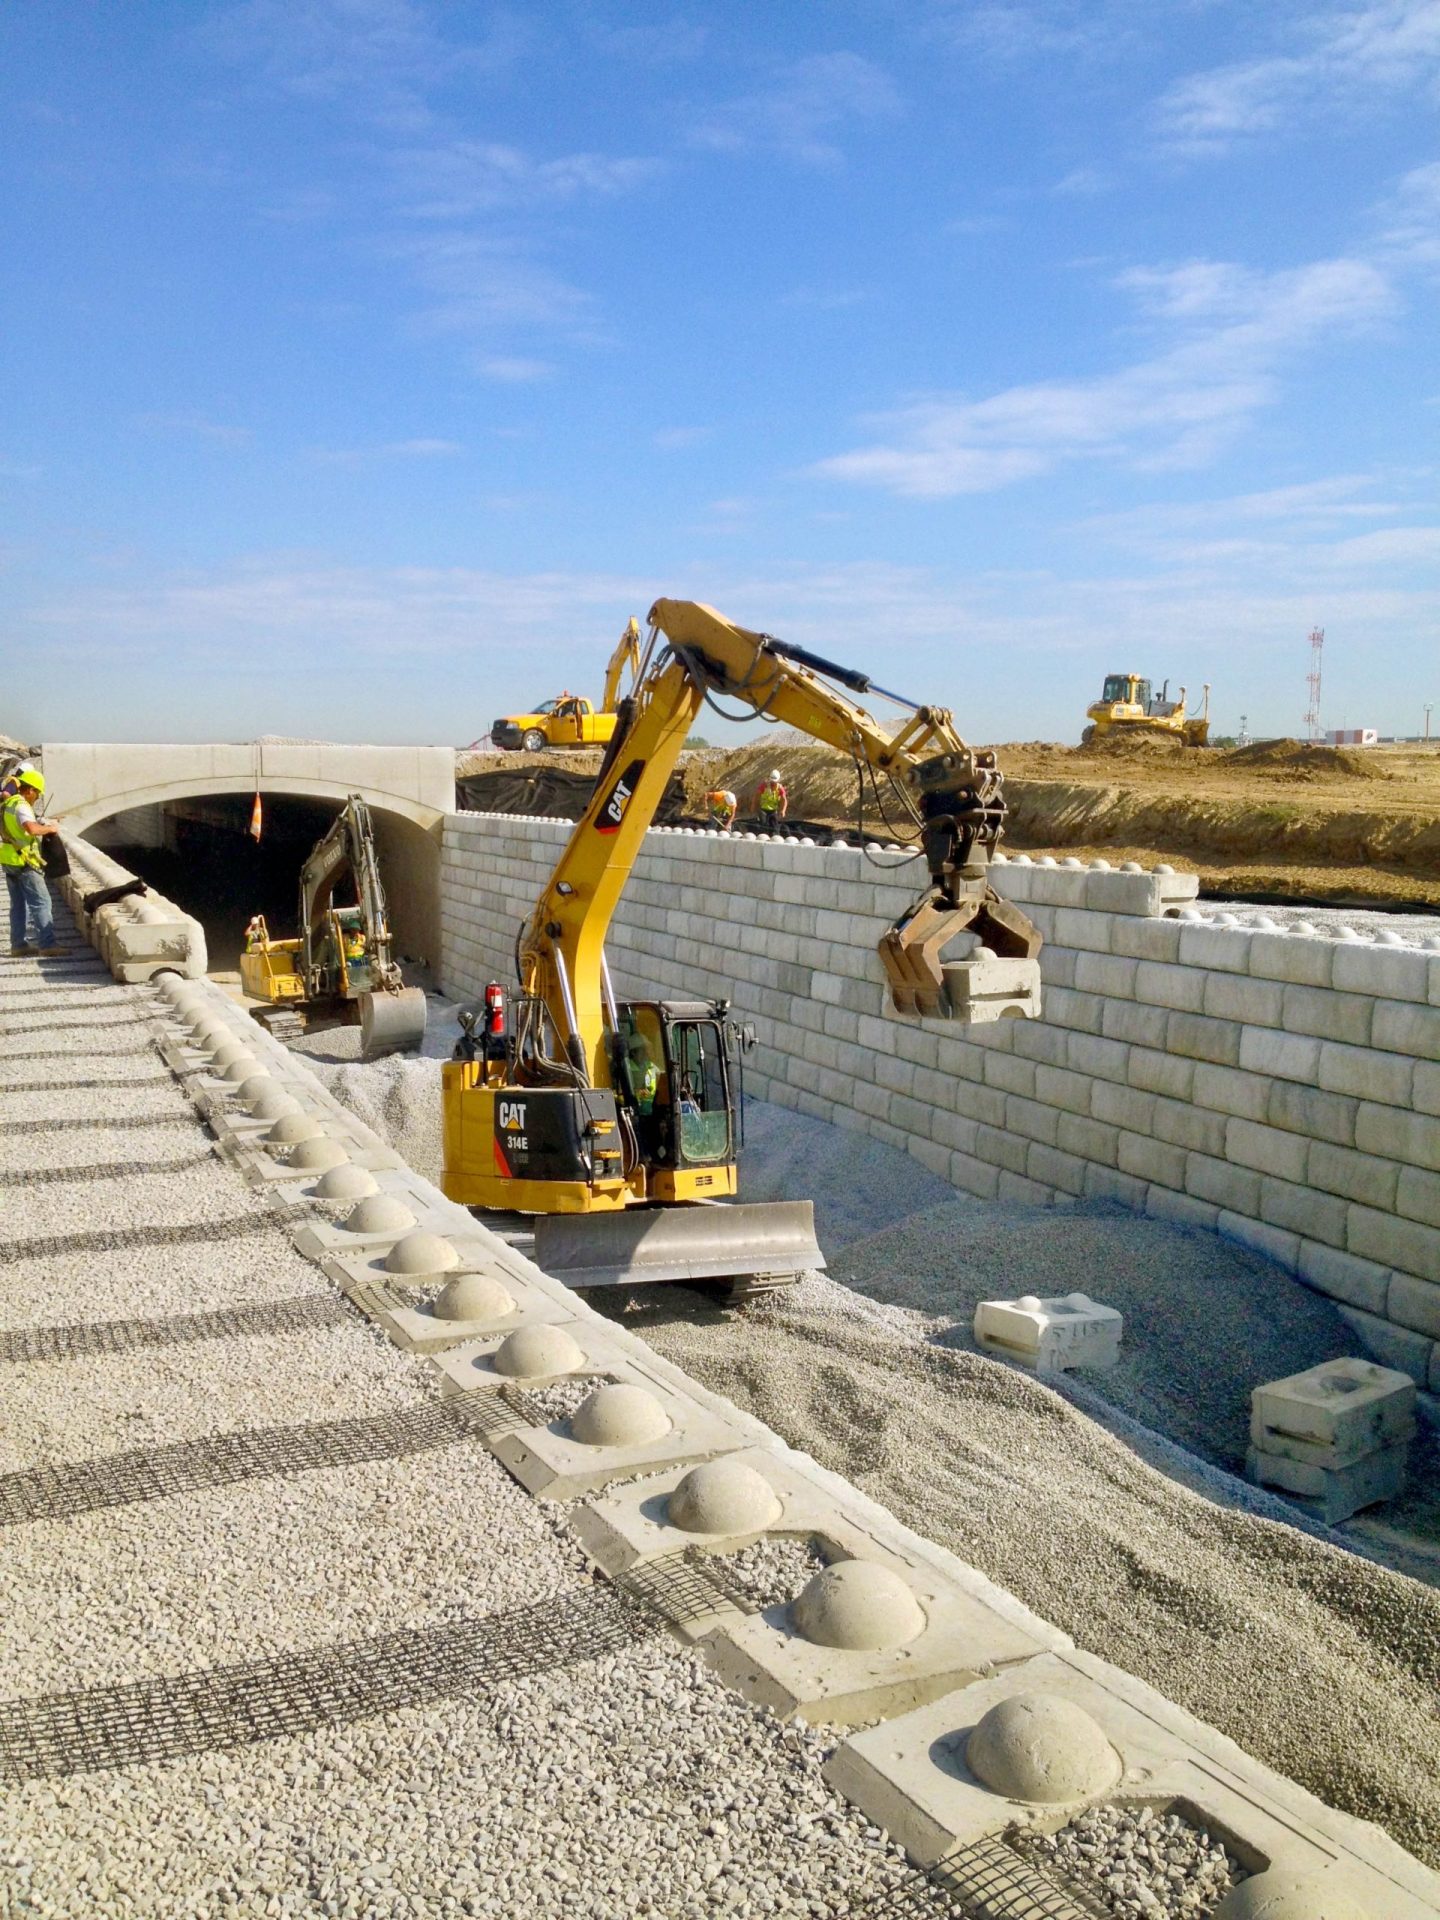
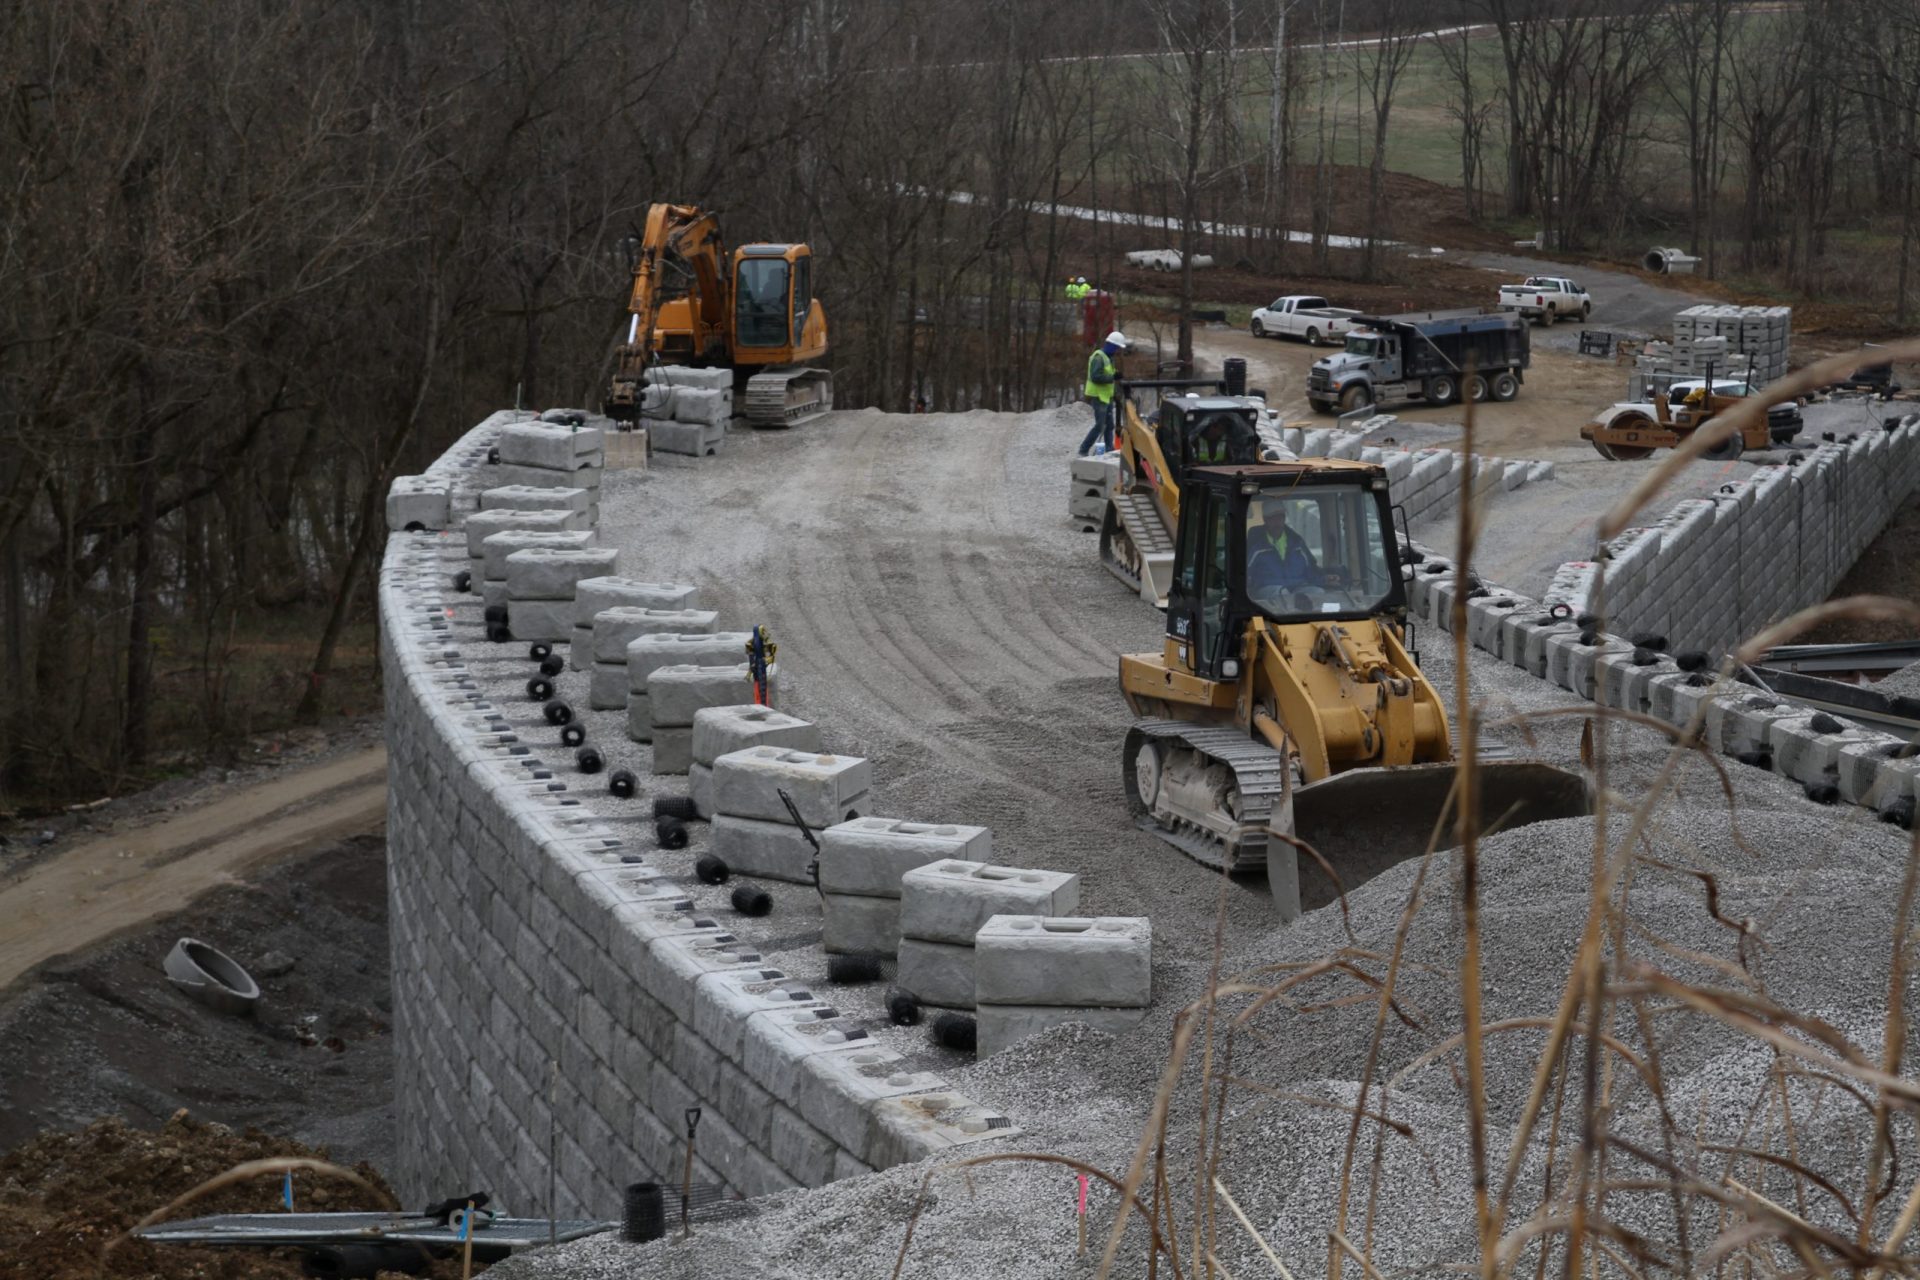
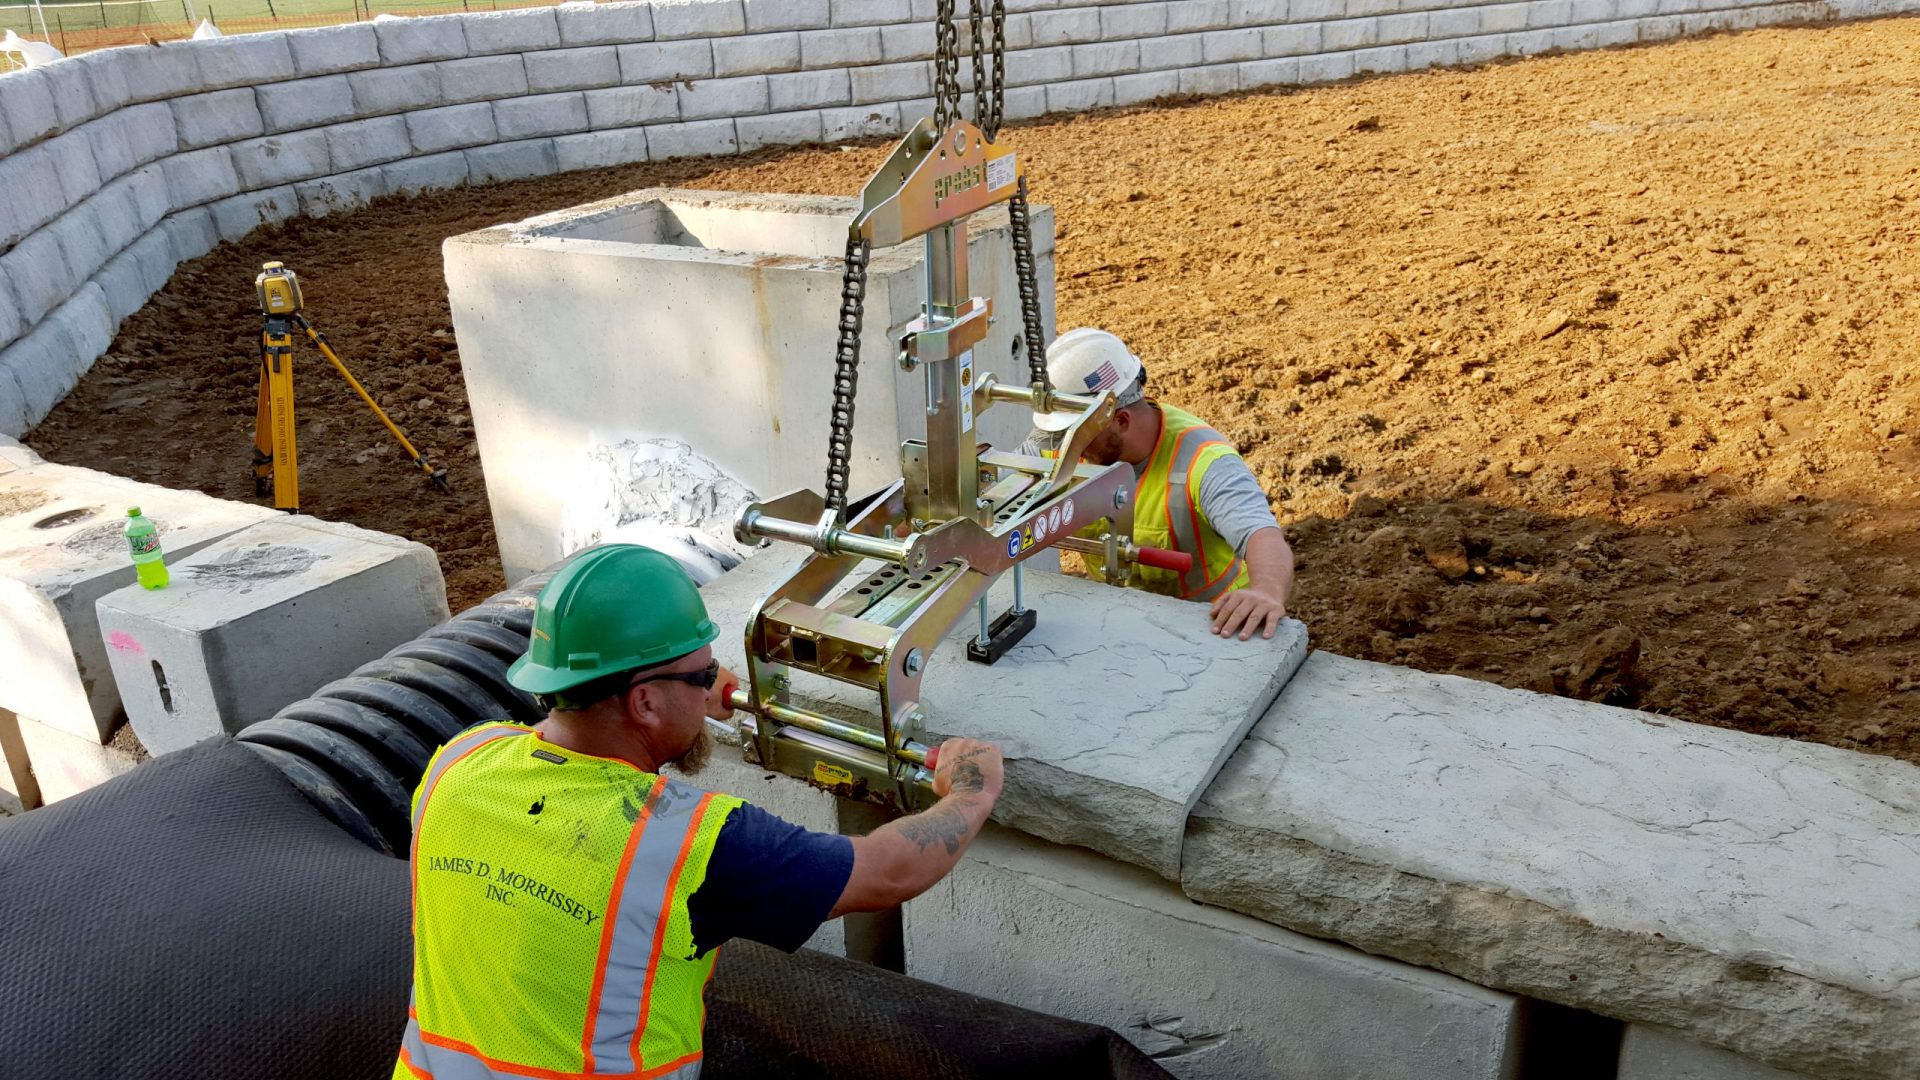
Step 4: Block Installation:
We leverage our expertise to seamlessly install the Redi-Rock blocks. Our skilled professionals utilize specialized equipment to ensure precise alignment and leveling of the blocks, capitalizing on the interlocking mechanism that characterizes the Redi-Rock system. This interlocking design creates a gravity retaining wall system, minimizing the need for additional reinforcement while maintaining superior strength.
Step 5: Backfill and Compaction:
Once the Redi-Rock blocks are securely in place, our attention turns to backfilling the void space behind the wall. We meticulously fill and compact the space with appropriate granular material, guaranteeing optimal support for the retaining wall. Through careful compaction in thin lifts, we achieve the desired level of compaction while mitigating the risk of settlement, thus ensuring the long-term stability of the installation.
Step 6: Finishing Touches:
We understand the importance of adding aesthetic value to the Redi-Rock installation. Our expertise allows us to seamlessly incorporate finishing touches, such as cap blocks or textured veneer faces, utilizing Redi-Rock's Ledgestone texture or other available options. These finishing touches enhance the visual appeal of the retaining wall, creating a remarkable structure that seamlessly integrates beauty and functionality.
Redi-Rock installations encompass a holistic approach that combines our expertise as both creators and installers of these exceptional retaining wall systems. Through meticulous site assessment, precise excavation, robust base preparation, seamless block installation, thorough backfilling, and meticulous finishing touches, we ensure that our Redi-Rock installations exemplify both structural integrity and aesthetic appeal. As a result, our clients can confidently rely on our comprehensive services, knowing that their retaining walls will stand the test of time, enhance their landscapes, and exceed their expectations in terms of strength and efficiency.